

Sunday, April 17, 2016
Sunday, December 27, 2015
Sulcata Tortoise Drawing


Tuesday, October 13, 2015
How to Draw a Kitten #2
 |
| Start with your outline (like with most things). |
 |
| Then add detail to the ears and face, this is also when you make the outline for the eyes. |
 |
| Then make the nose, mouth, and darken the outside of the face. |
 |
| Add fur to the ears and darken the chest. |
 |
| Then make the legs, paws, and the tail. |
 |
| Darken the outline on the rest of the cat and add pupils to the eyes. |
 |
| Draw a jagged line surrounding the pupil and another going around the inside of the eye (refer to picture). |
 |
| Then with a lighter color than you used before (blue) fill in the eye. |
 |
| Use black to fill in the pupils and leave a white dot in each. |
 |
| Use cold dark gray (or black if you want) to fill in the area around the eyes and the nose. You will also fill in most of the kitten with a light tannish-gray (unless you want to give the kitten different markings than the one in this tutorial). |
 |
| Use a dark brown to fill in the paws, outer ears, tail, and part of the face. |
 |
| Then use a pinkish-gray to fill in the ears. |
 |
| Now using a much darker brown, you can fill in the area around the face, completing your picture. |
Wednesday, June 3, 2015
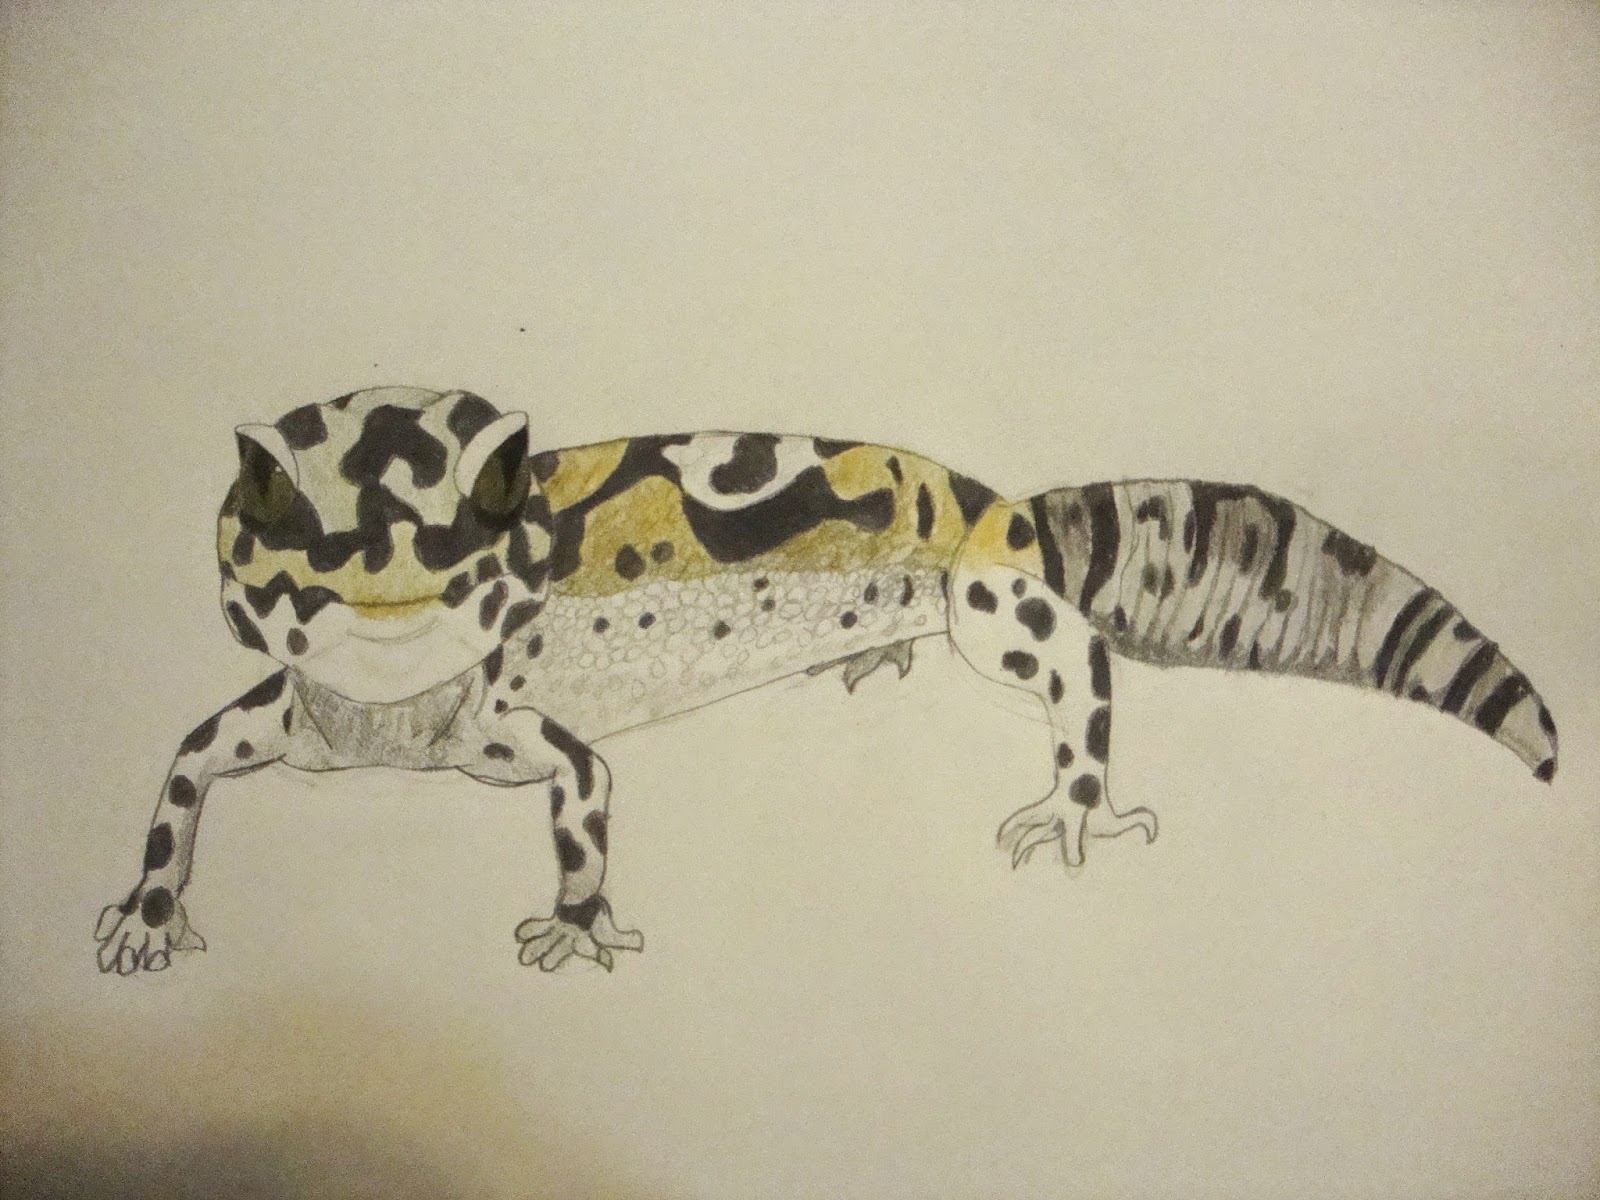
How to Draw a Leopard Gecko #2
For the next few weeks, I plan on redoing some of my old tutorials that weren't quite as good as they could have been (meaning that they looked pretty bad). So for today I am redoing a tutorial on how to draw a leopard gecko.
 |
| First start with the outline. |
 |
| Then add some curves for the eyes, eyelids, and sides of the face. |
 |
| Now draw the rest of the eyelids and two more curves to start the top of the head. |
 |
| Then another semi-curved line to connect the other two. |
 |
| Now draw the pupils inside each eye. |
 |
| Then, erase the excess lines on the face and add two more darkened lines on the sides of the face and connect them below. |
 |
| Now add the mouth, nose, and chin (I used the curved between the eyes to help position the nostrils although this step is not necessary). |
 |
| Now add some spots and patches on the face, except for under the chin. |
 |
| Then you darken the outline and add the beginning of some legs. |
 |
| Also erase the no longer needed outline on the front legs. |
 |
| Now make curved lines coming from the legs (the start for the feet) and a light line across the back. |
 |
| Add the front feet. |
 |
| And the back foot. |
 |
| Now make a swirled pattern on the back and add scales to the side (it is not a necessity but it makes it look a lot better). Also add the last foot. |
 |
| Now draw some spots on the front legs and shade between the designs on the back. |
 |
| Continue to add spots to the hind leg and draw lines and designs on the tail. |
 |
| Add some shading and then we are ready to add some color. |
 |
| First, you will do the pupils and inner eyelids black (you don't have to color it in this order, it's just the way that I did it). |
 |
| Then color in the spots with a warm gray (you could make these black, but I think that it looks better with the eyes being darker than the spots). |
 |
| Now add a light gray to the tail along with some brown for spots. |
 |
| You can do the eyes any color that you like, but I used a dark green. |
 |
| Then the yellow. I also added a light greenish-gray to the head. |
 |
| Then I added lime green to the eyelids. |
 |
| Now darken the feet and add any extra shading that you want. Normally this would be complete but since I was drawing mine from a picture that I took, I continued on from this point. |
 |
| I added some yellow since that is what the picture showed. |
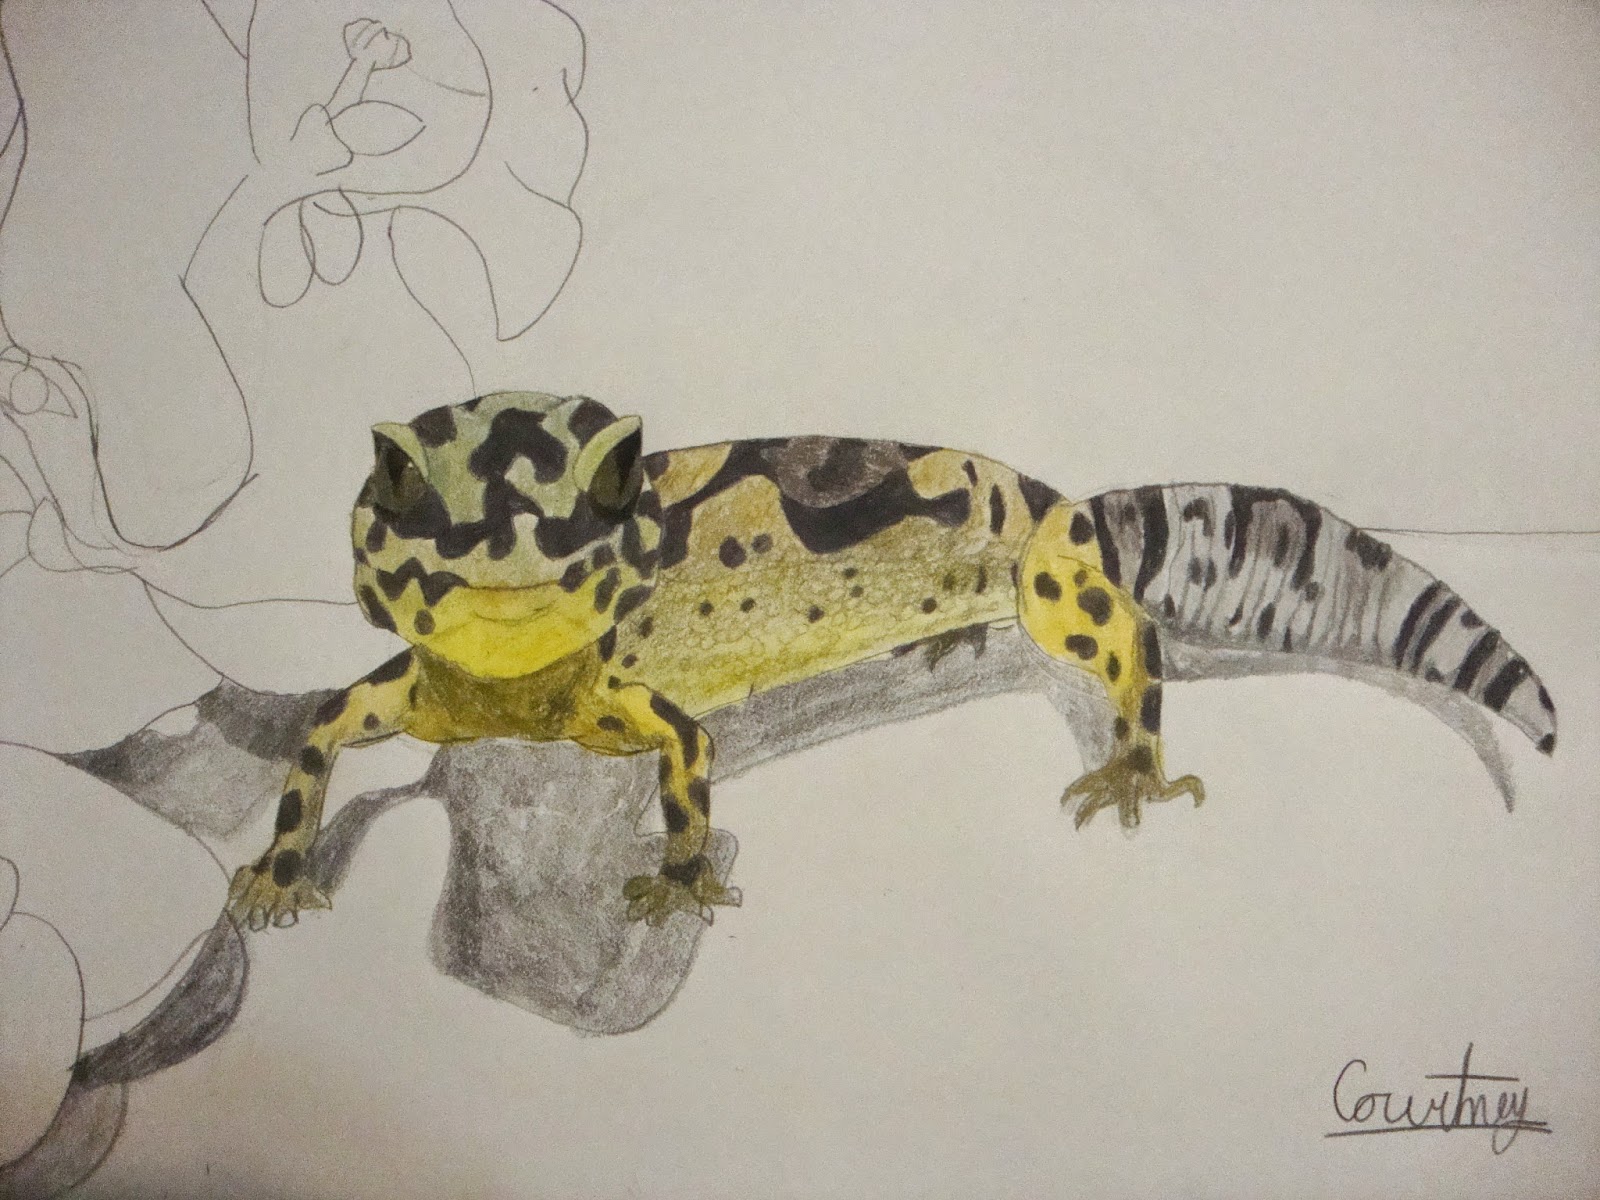 |
| Next I added a shadow and the rest of the background. |
 |
| Then after coloring in my picture, it is now finished. |

Tuesday, May 26, 2015
How to Draw a Fennec Fox
 |
| Start with a blank piece of paper that is positioned vertically. |
 |
| Now make the outline. I find it easiest if you start with the head. |
 |
| Once your outline is complete, add detail to the ears. |
 |
| And now the eyes, also erase all unnecessary lines on the face (I also added curved lines going down from the eyes to help position the nose and darkened the outline on the face). |
 |
| Now add the snout and nose. It works best if you use the lines that you made earlier that are coming down from the eyes to help position the snout and nose. (also add fade lines on the face as shown above). |
 |
| Add a jagged line going from ear to ear and some extra shading on the face. |
 |
| Now darken the outlines on the face. |
 |
| And darken the outline on the rest of the fox as well. |
 |
| Now add the feet. |
 |
| Erase the lines and darken the tail outline and add shading under the neck, on the tail, and the front and hind leg. |
 |
| Now darken the entire outline even more (I also changed the fur on the hind leg and added more lines throughout). |
 |
| Now color the eyes. I think that dark brown looks best, but you can choose whatever color you like (I also darkened the shading on the face and shaded the right hind leg). |
 |
| Get a light gray (very light) and color the face, neck, most of the front legs, and a large portion of the hind leg and back (use picture as reference). |
 |
| Then color the tail and shoulder with a deep orange-brown. Also add it more lightly on parts of the front and hind leg. |
 |
| Now using a light yellow/tan, color in the remaining areas (I also added a pinkish gray to the ears). |
 |
| Finish shading and now your picture is complete. |
You can also see my wikihow tutorial on "How to Draw a Fennec Fox" Here
Subscribe to:
Posts (Atom)